What is HPP Address Capture?
In addition to capturing card information for online payment, you can use the Global Payments Hosted Payment Page (HPP) to capture other customer details such as billing and shipping addresses. To input this information, customers can use separate HPP address forms during checkout.
If you’re already capturing customer contact information like email, phone number, and country, you can pass that data in the HPP request to also display on the HPP forms. Because all of this information is captured directly on the HPP, your customers can feel secure about providing sensitive personal data during the transaction process.
How does HPP Address Capture work?
The HPP facilitates capturing customer information and returns the data along with transaction details in the merchant response URL. Alternatively, you can choose to only return the transaction details in the response if you do not require the customer information.
If you’re using other Global Payments solutions through the HPP like 3D Secure 2, Local Payment Methods, and Fraud Management, the information gathered through the HPP will be used to populate the associated required fields. In other words, you don’t have to provide that additional information in the HPP request.
To enable HPP Address Capture, contact a member of our support team or your account manager.
HPP Address Capture fields
The HPP Address Capture feature includes the following additional fields:
- HPP CAPTURE ADDRESS – Determines if the address forms will be displayed on the HPP.
- HPP DO NOT RETURN ADDRESS – Determines if the HPP response will contain the address and contact information.
- HPP REMOVE SHIPPING ADDRESS – Determines if only the billing address and payment forms will be displayed.
For more information, see the HPP additional fields section below.
Example HPP address forms
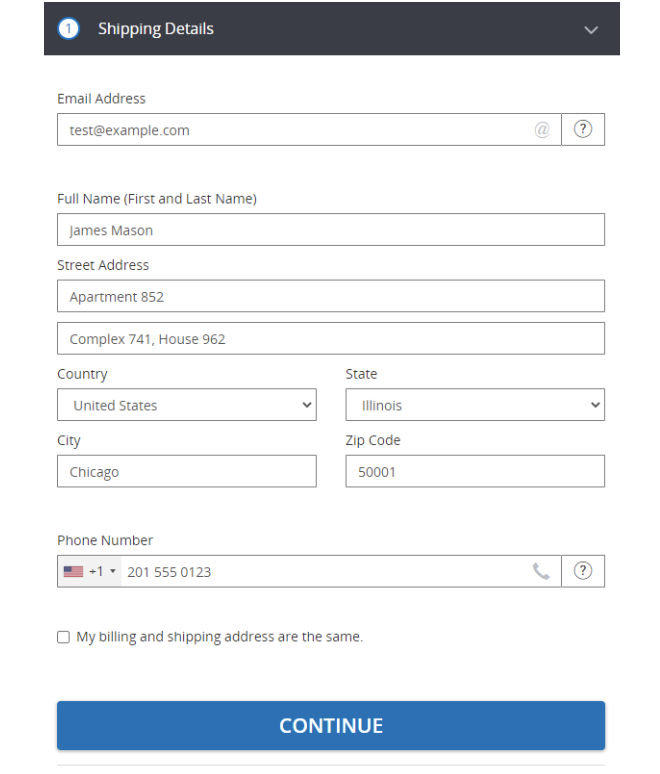
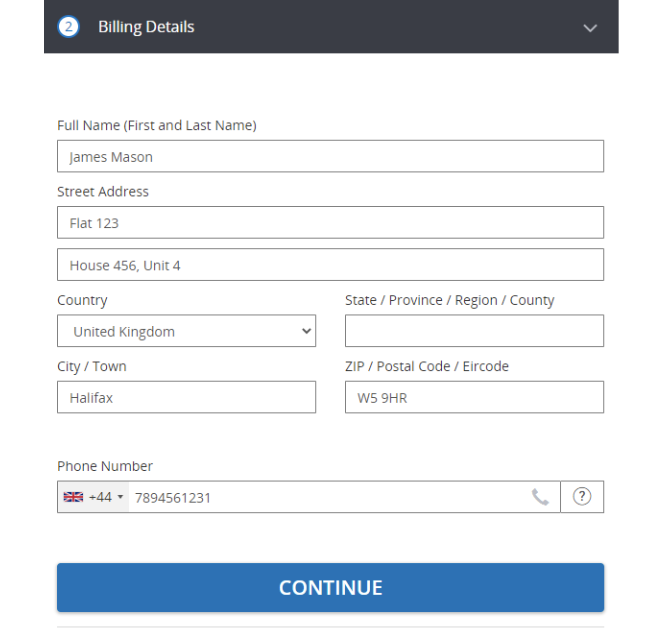
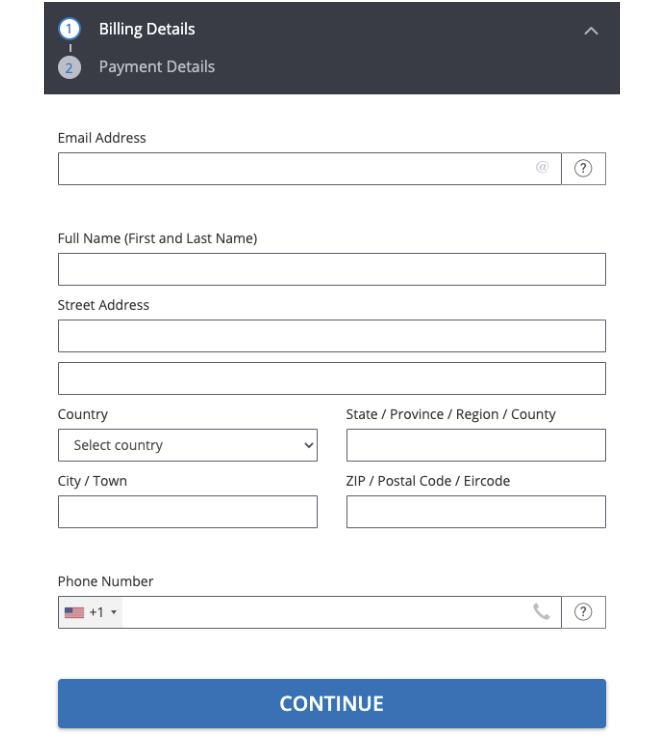
You can use the HPP to present separate address forms to the customer—one for shipping and one for billing. You can also present only the billing address form. Like the HPP card form, the HPP address form can be customized to match the design of your website or application.
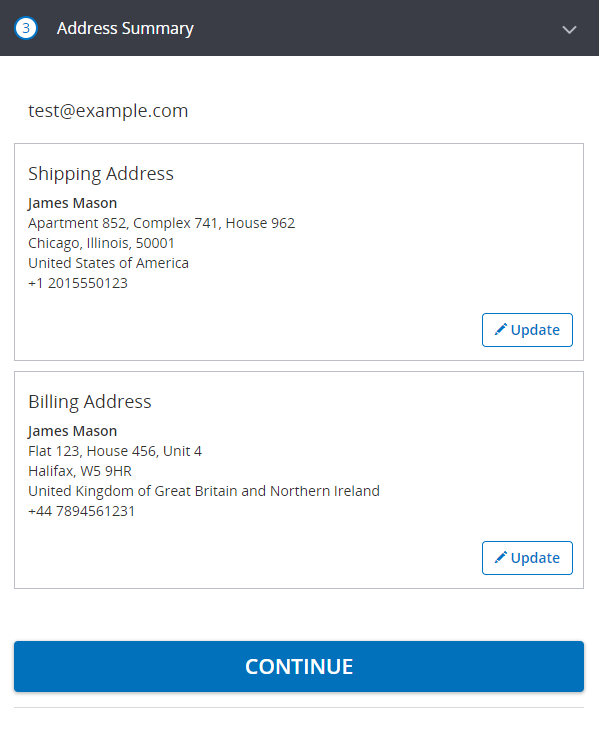
The shipping form contains a checkbox that allows a customer to indicate that their billing address and shipping address are the same. If the checkbox is selected, the Address Summary page appears displaying the same address for both. From here, the customer can update the shipping address or choose a different billing address. By clicking Continue, they’ll move to the payment form.
Shipping address form
Billing address form
Billing address only
Set up your request
After the HPP Additional Fields feature is enabled by your account manager, you don’t need to add any new data to your request. Global Payments will enable the additional fields automatically.
HPP additional fields
You can use the HPP additional fields to control how the Address Capture feature is displayed to the customer as well as determine the information that will be returned in the HPP response.
| Field | Description |
|---|---|
|
|
Determines whether the address forms will be displayed on the HPP. Allowed values: True - Address forms are enabled False - Address forms are disabled |
|
|
Determines whether or not the HPP response will contain the address and contact information. Allowed values: True - The HPP response will not contain the address and contact information and only contain the transaction details. False - The HPP response will contain the address and contact information. If the field is not present, by default the HPP will return the transaction details as well as the address and contact information in the response. |
HPP_REMOVE_SHIPPING |
Determines whether the HPP will show only the billing address and payment forms. Allowed values: True - Only billing address and payment forms are shown. False - Shipping address, billing address, address summary, and payment forms are shown. If the field is not present, the shipping address, billing address, address summary, and payment forms will be shown by default when the Address Capture functionality is enabled. |
<form action="https://pay.sandbox.realexpayments.com/pay" method="POST" target="iframe">
  <input type="hidden" name="TIMESTAMP" value="20180613110737">
  <input type="hidden" name="MERCHANT_ID" value="MerchantId">
  <input type="hidden" name="ACCOUNT" value="internet">
  <input type="hidden" name="ORDER_ID" value="N6qsk4kYRZihmPrTXWYS6g">
  <input type="hidden" name="AMOUNT" value="1999">
  <input type="hidden" name="CURRENCY" value="EUR">
  <input type="hidden" name="AUTO_SETTLE_FLAG" value="1">
  <input type="hidden" name="COMMENT1" value="Mobile Channel">
  <input type="hidden" name="HPP_VERSION" value="2">
  <input type="hidden" name="HPP_CHANNEL" value="ECOM">
  <input type="hidden" name="HPP_LANG" value="en">

  <!-- Begin HPP additional Fields -->
  <input type="hidden" name="HPP_CAPTURE_ADDRESS" value="true">
  <input type="hidden" name="HPP_REMOVE_SHIPPING" value="true">
  <input type="hidden" name="HPP_DO_NOT_RETURN_ADDRESS" value="false">
  <!-- End HPP additional Fields -->

  <input type="hidden" name="MERCHANT_RESPONSE_URL" value="https://www.example.com/responseUrl">
  <input type="hidden" name="CARD_PAYMENT_BUTTON" value="Pay Invoice">
  <input type="hidden" name="CUSTOM_FIELD_NAME" value="Custom Field Data">
  <input type="hidden" name="SHA1HASH" value="308bb8dfbbfcc67c28d602d988ab104c3b08d012">
  <input type="submit" value="Click To Pay">
</form>Pass other customer data in request
If you’re already capturing some customer information like email, phone number, and country, you can pass it to the HPP as shown in the example below.
<input type="hidden" name="HPP_CUSTOMER_EMAIL" value="test@example.com">
<input type="hidden" name="HPP_SHIPPING_PHONE" value="44|789456123">
<input type="hidden" name="HPP_SHIPPING_COUNTRY" value="826">
The input tags will become their respective fields on the form. The customer can then enter their information into the fields.
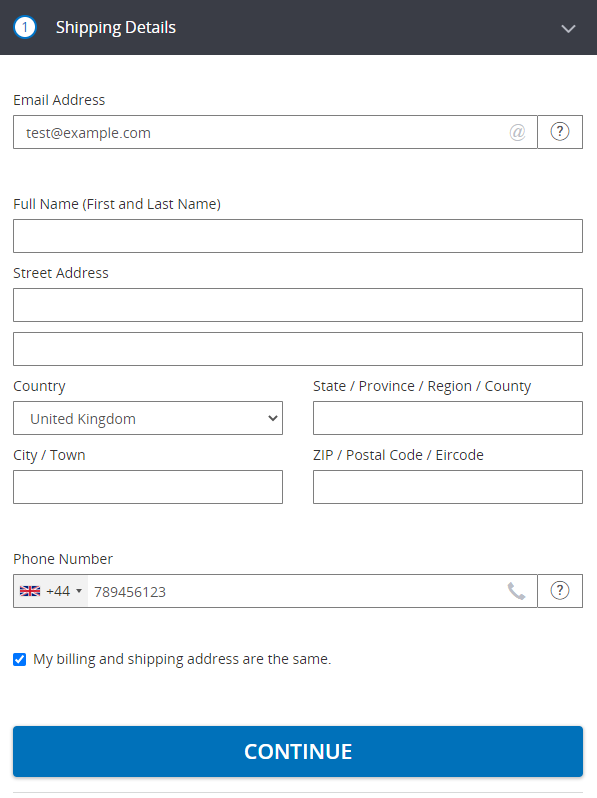
Address Summary page
The Address Summary page displays an overview of the information that the customer has entered. Once the customer finishes the shipping and billing forms and selects to continue, they will be brought to the Address Summary page.
3D Secure 2 required fields
The 3D Secure authentication flow requires additional customer information to be provided in the request. The HPP facilitates the capture of this data, so you don’t need to provide it in your HPP request.
The HPP gathers the below information required for 3D Secure 2:
- Email Address
- Phone Number
- Billing Address Street
- Billing Address City
- Billing Address State (if required)
- Billing Address Postal Code
- Billing Address Country
- Shipping Address Street
- Shipping Address City
- Shipping Address State (if required)
- Shipping Address Postal Code
- Shipping Address Country
Customize style
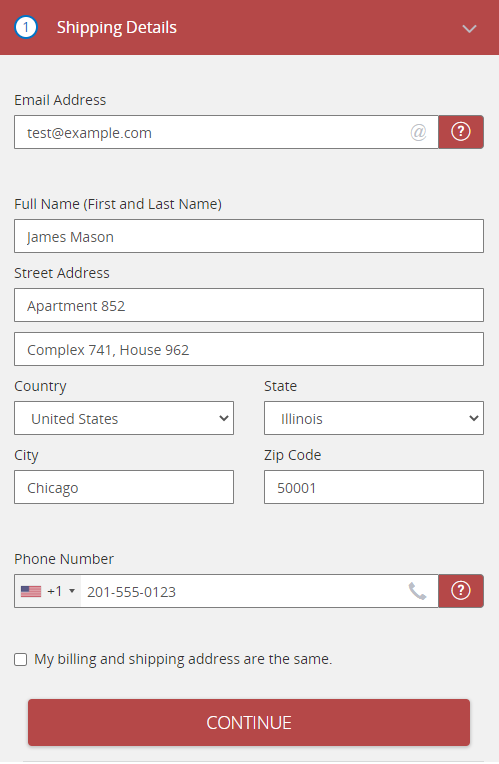
You can customize the HPP to match the design of your website or application by making simple CSS changes. For more information, see our HPP Customization article.
Example CSS
/*----------------- MAIN CONTAINER -----------------*/
.portfolio-realex {
    background: #f1f1f1;
    max-width: 500px;

}
/*----------------- HEADER -----------------*/
/* This includes the breadcrumb and the title */
div#rxp-header-title {
    background-color: #b54848;
    font-family: 'Open sans';
}

/* Controls the box around the header */
.breadcrumb-address-details {
    border: none;
}

/* This is for the text of the current breadcrumb */
.current-breadcrumb-item {
    left: 0;
    right: 13.06%;
    top: 0;
    font-family: 'Open Sans',sans-serif;
    font-style: normal;
    font-weight: 500;
    font-size: 16px;
    line-height: 24px;
    align-items: center;
    color: #ffffff;
    display: inline-block;
    margin-top: 2.3%;
}

/* This is for the text of the next breadcrumb */
.next-breadcrumb-item {
    display: inline-block;
    color: #ffffffba;
    font-style: normal;
    font-weight: 400;
}

/* This is for the icon of the tooltip */
.input-group-addon {
    padding: 6px 12px;
    font-size: 14px;
    font-weight: normal;
    line-height: 1;
    color: #fff;
    text-align: center;
    background-color: #b54848;
    border-radius: 4px;
}

/* this is a div that contains the loading animation */
#info-box-footer {
    display: none;
}
/*----------------- FORM -----------------*/
/* main wrapper around elements */
.panel {
    border-color: #ffffff16;
    box-shadow: 0 1px 1px white;
}

/* wrapper around the payment form */
#rpx-another-card {
    background: #f1f1f1;
}

/*----------------- BUTTON -----------------*/
/* this is the box around the button */
#main-btn-box {
    width: 94%;
    margin-left: 3%;
}
/* this is the actual button */
#main-btn-box .btn-hpp-a {
    font-size: 1.25em;
    background-color: #b54848;
    font-weight: 100;
}
/*----------------- FOOTER -----------------*/
/* this is for the entire footer */
#rxp-footer {
    background-color: white;
    padding: 0 0 0 8px;
    margin-left: 2%;
}